Greetings, disc golf enthusiasts! Are you ready to unravel the mysteries of the hyzer and anhyzer? Whether you’re a novice or a seasoned pro, enhancing your understanding of these two throwing techniques can dramatically elevate your gameplay. Let’s embark on this fun journey of understanding the art of these throws and how to employ them strategically.
Dissecting the Hyzer and Anhyzer Throws: It’s All About the Angle
Often, when we discuss hyzer and anhyzer throws, we tend to focus on the disc’s flight path after it has left the thrower’s hand. But, in reality, the essence of these throws lies not in the flight, but in the angle of release. Here’s how it works:
The Hyzer Throw: Like Tossing a Frisbee to Your Dog
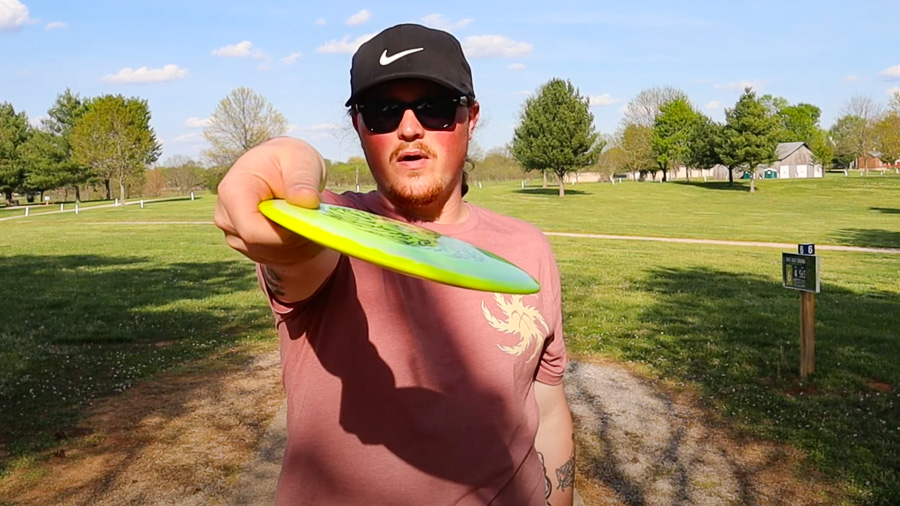
Visualize tossing a frisbee to your pet dog, the top of the disc leaning away from you at release. That’s precisely what a hyzer throw is all about. This specific angle causes the disc’s outer edge to tilt downward slightly, influencing the disc to follow a trajectory curving towards the throwing hand. Therefore, a right-hand backhand (RHBH) hyzer throw will curve left, while a left-hand backhand (LHBH) will bend right.
The Anhyzer Throw: The Flick of the Wrist
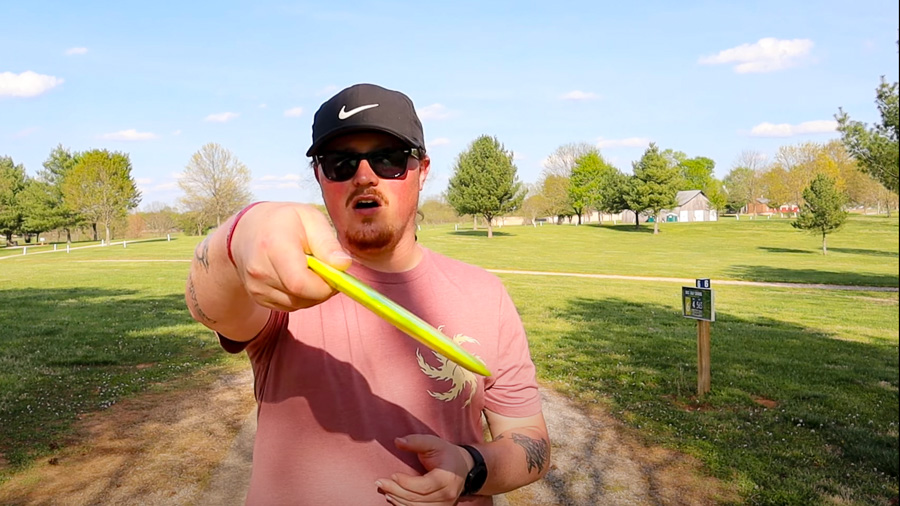
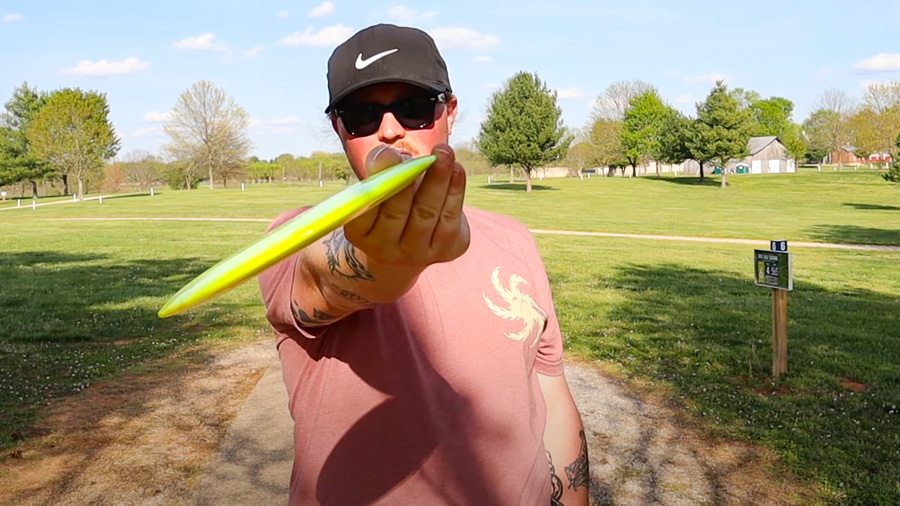
On the other hand, imagine an anhyzer throw as a stylish flick of the wrist, where the top of the disc faces towards you during release. This angle lifts the disc’s outer edge upwards, causing the flight trajectory to curve in the opposite direction of the throwing hand. So, for a RHBH throw, the disc will curve to the right, and for a LHBH throw, it will curve left.
Tactical Play: Why Hyzer and Anhyzer Throws Matter
These throws aren’t just to show off your disc golf skills, but they hold substantial strategic significance to enhance your gameplay. Let’s explore how:
- Steering Clear of Hazards: Think of the times when your hole is surrounded by dreaded out-of-bounds markers or potentially disc-swallowing water bodies. Here, a skilfully employed hyzer or anhyzer throw can steer your disc away from danger and towards a safer landing zone.
- Mastering the Art of Avoidance: Obstacles, be they towering trees or sneaky bushes, are an integral part of the game. But, why aim through them when you can go around? By mastering the hyzer and anhyzer throws, you can curve your disc around these obstructions, turning potential pitfalls into opportunities.
- Navigating Sharp Course Angles: Some disc golf courses seem designed to challenge every throw in your arsenal, featuring sharp dogleg left or dogleg right holes. In these situations, hyzer and anhyzer throws can be your secret weapon, allowing you to handle these tricky angles with ease and grace.
Your Journey to Mastery: Improving Your Hyzer and Anhyzer Throws
Understanding the theory behind the hyzer and anhyzer is one thing, but mastering these throws is another. Here are some friendly pointers to help you on your way:
- Choosing the Right Disc: Just as you wouldn’t use a sledgehammer to crack a nut, you shouldn’t use an overstable disc for a roller shot. Selecting the right disc for your skill level and the specific shot you’re aiming for is crucial. Remember, each disc behaves differently, so choose wisely to improve your throws.
- Practice, Practice, Practice: The old adage still holds – practice makes perfect. The road to mastering any skill is paved with consistent practice. So, whether the sun is shining or the leaves are falling, keep practicing those throws.
- Patience is a Virtue: Don’t forget that disc golf is a game that requires patience. Mastery isn’t achieved in a day; it can take months, even years, to perfect. Remember to celebrate your small victories along the way, and keep striving for progress, not perfection.
- Master the Forehand and Backhand: You can’t rely on a one-throw-fits-all approach in disc golf. Each hole presents a unique challenge, and often, you’ll need both forehand and backhand throws in your arsenal. Mastering these throws can greatly enhance your versatility and overall game performance.
- One Shot at a Time: When learning, it’s easy to get overwhelmed by the variety of throws. Focus on mastering one type of throw before moving on to the next. This approach allows you to invest your time and energy into perfecting each shot before adding another to your repertoire.
- Learn the Hyzer Flip: Mastering the hyzer flip throw is essential to progress in your disc golf game. Just watch any highly rated player and you are guaranteed to see them throw this powerful shot. The video below explains the shot and breaks down how to grip the disc and other key concepts to the throw:
Remember that the direction of your disc’s flight is determined by the side of the disc that faces downward during the throw. If the top faces away from you, it’s a hyzer throw, and if it faces towards you, it’s an anhyzer. So, with your newfound knowledge and a bit of practice, it’s time to step out onto the disc golf course and let your discs fly! You’re well on your way to perfecting your game and making the most of every round. Happy throwing!